Introduction
In the previous iteration, we successfully deployed a simple web page using Docker and exposed it to the internet through HTTP on port 80.
While this setup was enough to understand the basics of networking, DNS, and container deployment, it has an obvious limitation: all traffic is transmitted in plain text. Anyone between the client and the server could potentially inspect or modify the exchanged data.
The next logical step is therefore enabling HTTPS using SSL/TLS encryption.
There are many different ways to achieve this. A common approach would be to use Let’s Encrypt certificates directly on the server. However, since the domain is already managed through Cloudflare, I decided to use Cloudflare’s SSL/TLS features to simplify the process and learn how a CDN and reverse proxy can participate in the TLS chain.
Cloudflare SSL/TLS
In the previous post, Cloudflare was configured in DNS Only mode. In this configuration, Cloudflare only resolved the domain name and all traffic was sent directly to the home server.
For this iteration, I enabled Cloudflare’s proxy functionality by switching the DNS record to Proxied mode.

Once enabled, requests no longer travel directly to the server:
Browser → Cloudflare → Home Server
This introduces several benefits:
- HTTPS support
- DDoS protection
- Basic firewall capabilities
- Request filtering
- Traffic analytics
The SSL/TLS mode was configured as Full (Strict).
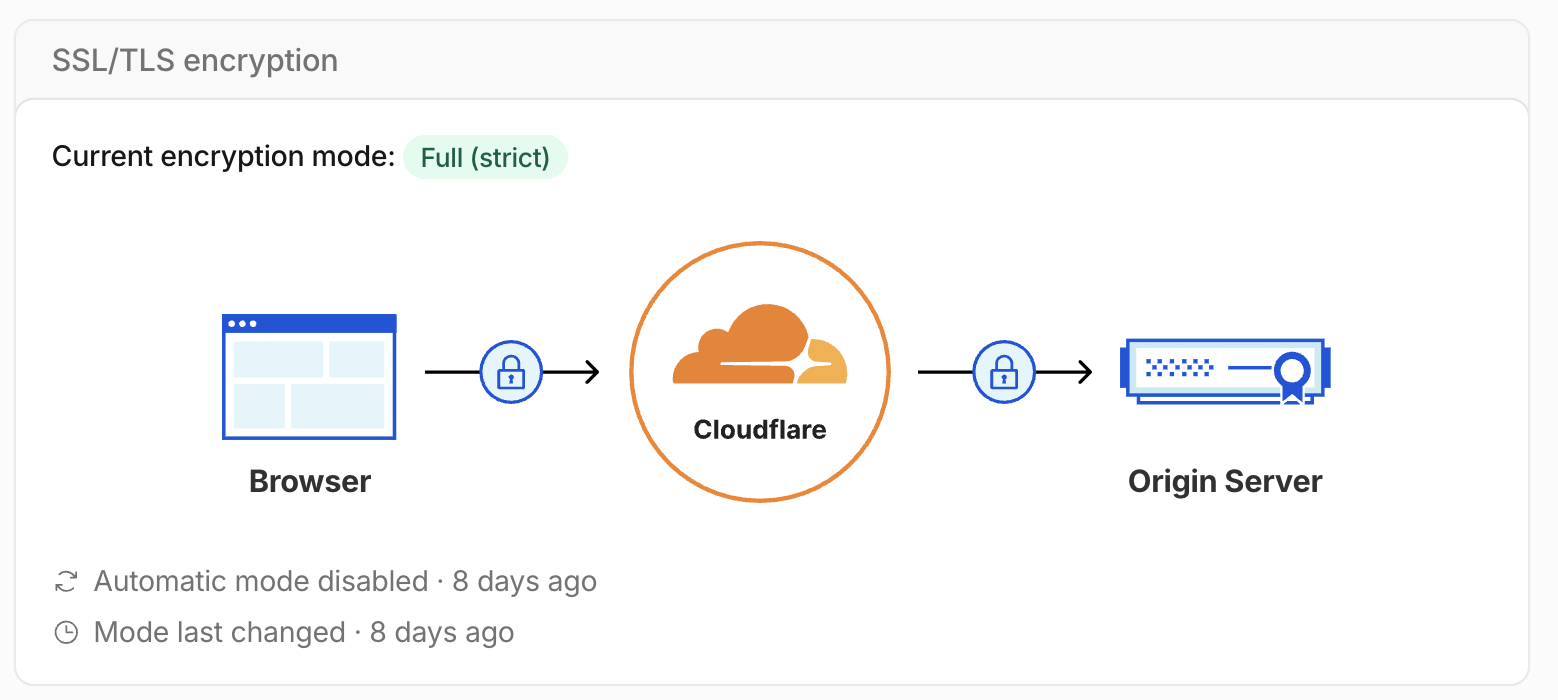
This mode encrypts traffic on both segments of the connection:
Browser ⇄ Cloudflare ⇄ Home Server
Unlike the less restrictive Full mode, Cloudflare validates the certificate presented by the origin server before forwarding traffic. This prevents man-in-the-middle attacks between Cloudflare and the server.
Cloudflare Origin Certificate
To allow Cloudflare to validate the server certificate, an Origin Certificate was generated from the Cloudflare dashboard.
The generated certificate and private key were copied to the server:
sudo mkdir -p /opt/certs/cloudflare
/opt/certs/cloudflare/
├── cert.pem
└── key.pem
These files will later be mounted inside the Nginx container.
Nginx HTTPS Configuration
A simple Nginx configuration was created to serve the website over HTTPS.
server {
    listen 443 ssl;
    server_name marcgeremias.com;

    ssl_certificate     /etc/nginx/certs/cert.pem;
    ssl_certificate_key /etc/nginx/certs/key.pem;

    root /usr/share/nginx/html;
    index index.html;

    location / {
        try_files $uri $uri/ =404;
    }
}
The configuration references the Cloudflare certificate and private key that will be mounted into the container.
Docker container deployment
Instead of manually copying static files into a running Nginx container, I decided to create a proper Docker image for the blog.
The image uses a multi-stage build.
The first stage generates the static website using Hugo:
FROM hugomods/hugo:exts-0.146.0 AS builder

WORKDIR /site

COPY . .

RUN hugo --minify -e production
The second stage uses a lightweight Nginx image to serve the generated files:
FROM nginx:alpine

RUN rm -rf /usr/share/nginx/html/*

COPY --from=builder /site/public /usr/share/nginx/html

CMD ["nginx", "-g", "daemon off;"]
The image can then be built and pushed to GitHub Container Registry:
docker buildx build \
  --platform linux/amd64 \
  -t ghcr.io/marcgeremias/marcgeremias-blog:latest \
  --push .
Finally, the container can be deployed on the server:
docker run -d \
  --name marc-blog \
  --restart unless-stopped \
  -p 443:443 \
  -v /opt/certs/cloudflare:/etc/nginx/certs:ro \
  -v /opt/marc-blog/nginx/nginx.conf:/etc/nginx/conf.d/default.conf \
  ghcr.io/marcgeremias/marcgeremias-blog:latest
The certificate directory is mounted as read-only and the custom Nginx configuration is injected into the container.
Verifying the Cloudflare proxy
One simple way to verify that traffic is now passing through Cloudflare is using curl. Before enabling the proxy, DNS resolution returned the public IP address of the home connection.
After enabling the proxy, the domain resolves to Cloudflare infrastructure instead.
curl -I https://marcgeremias.com
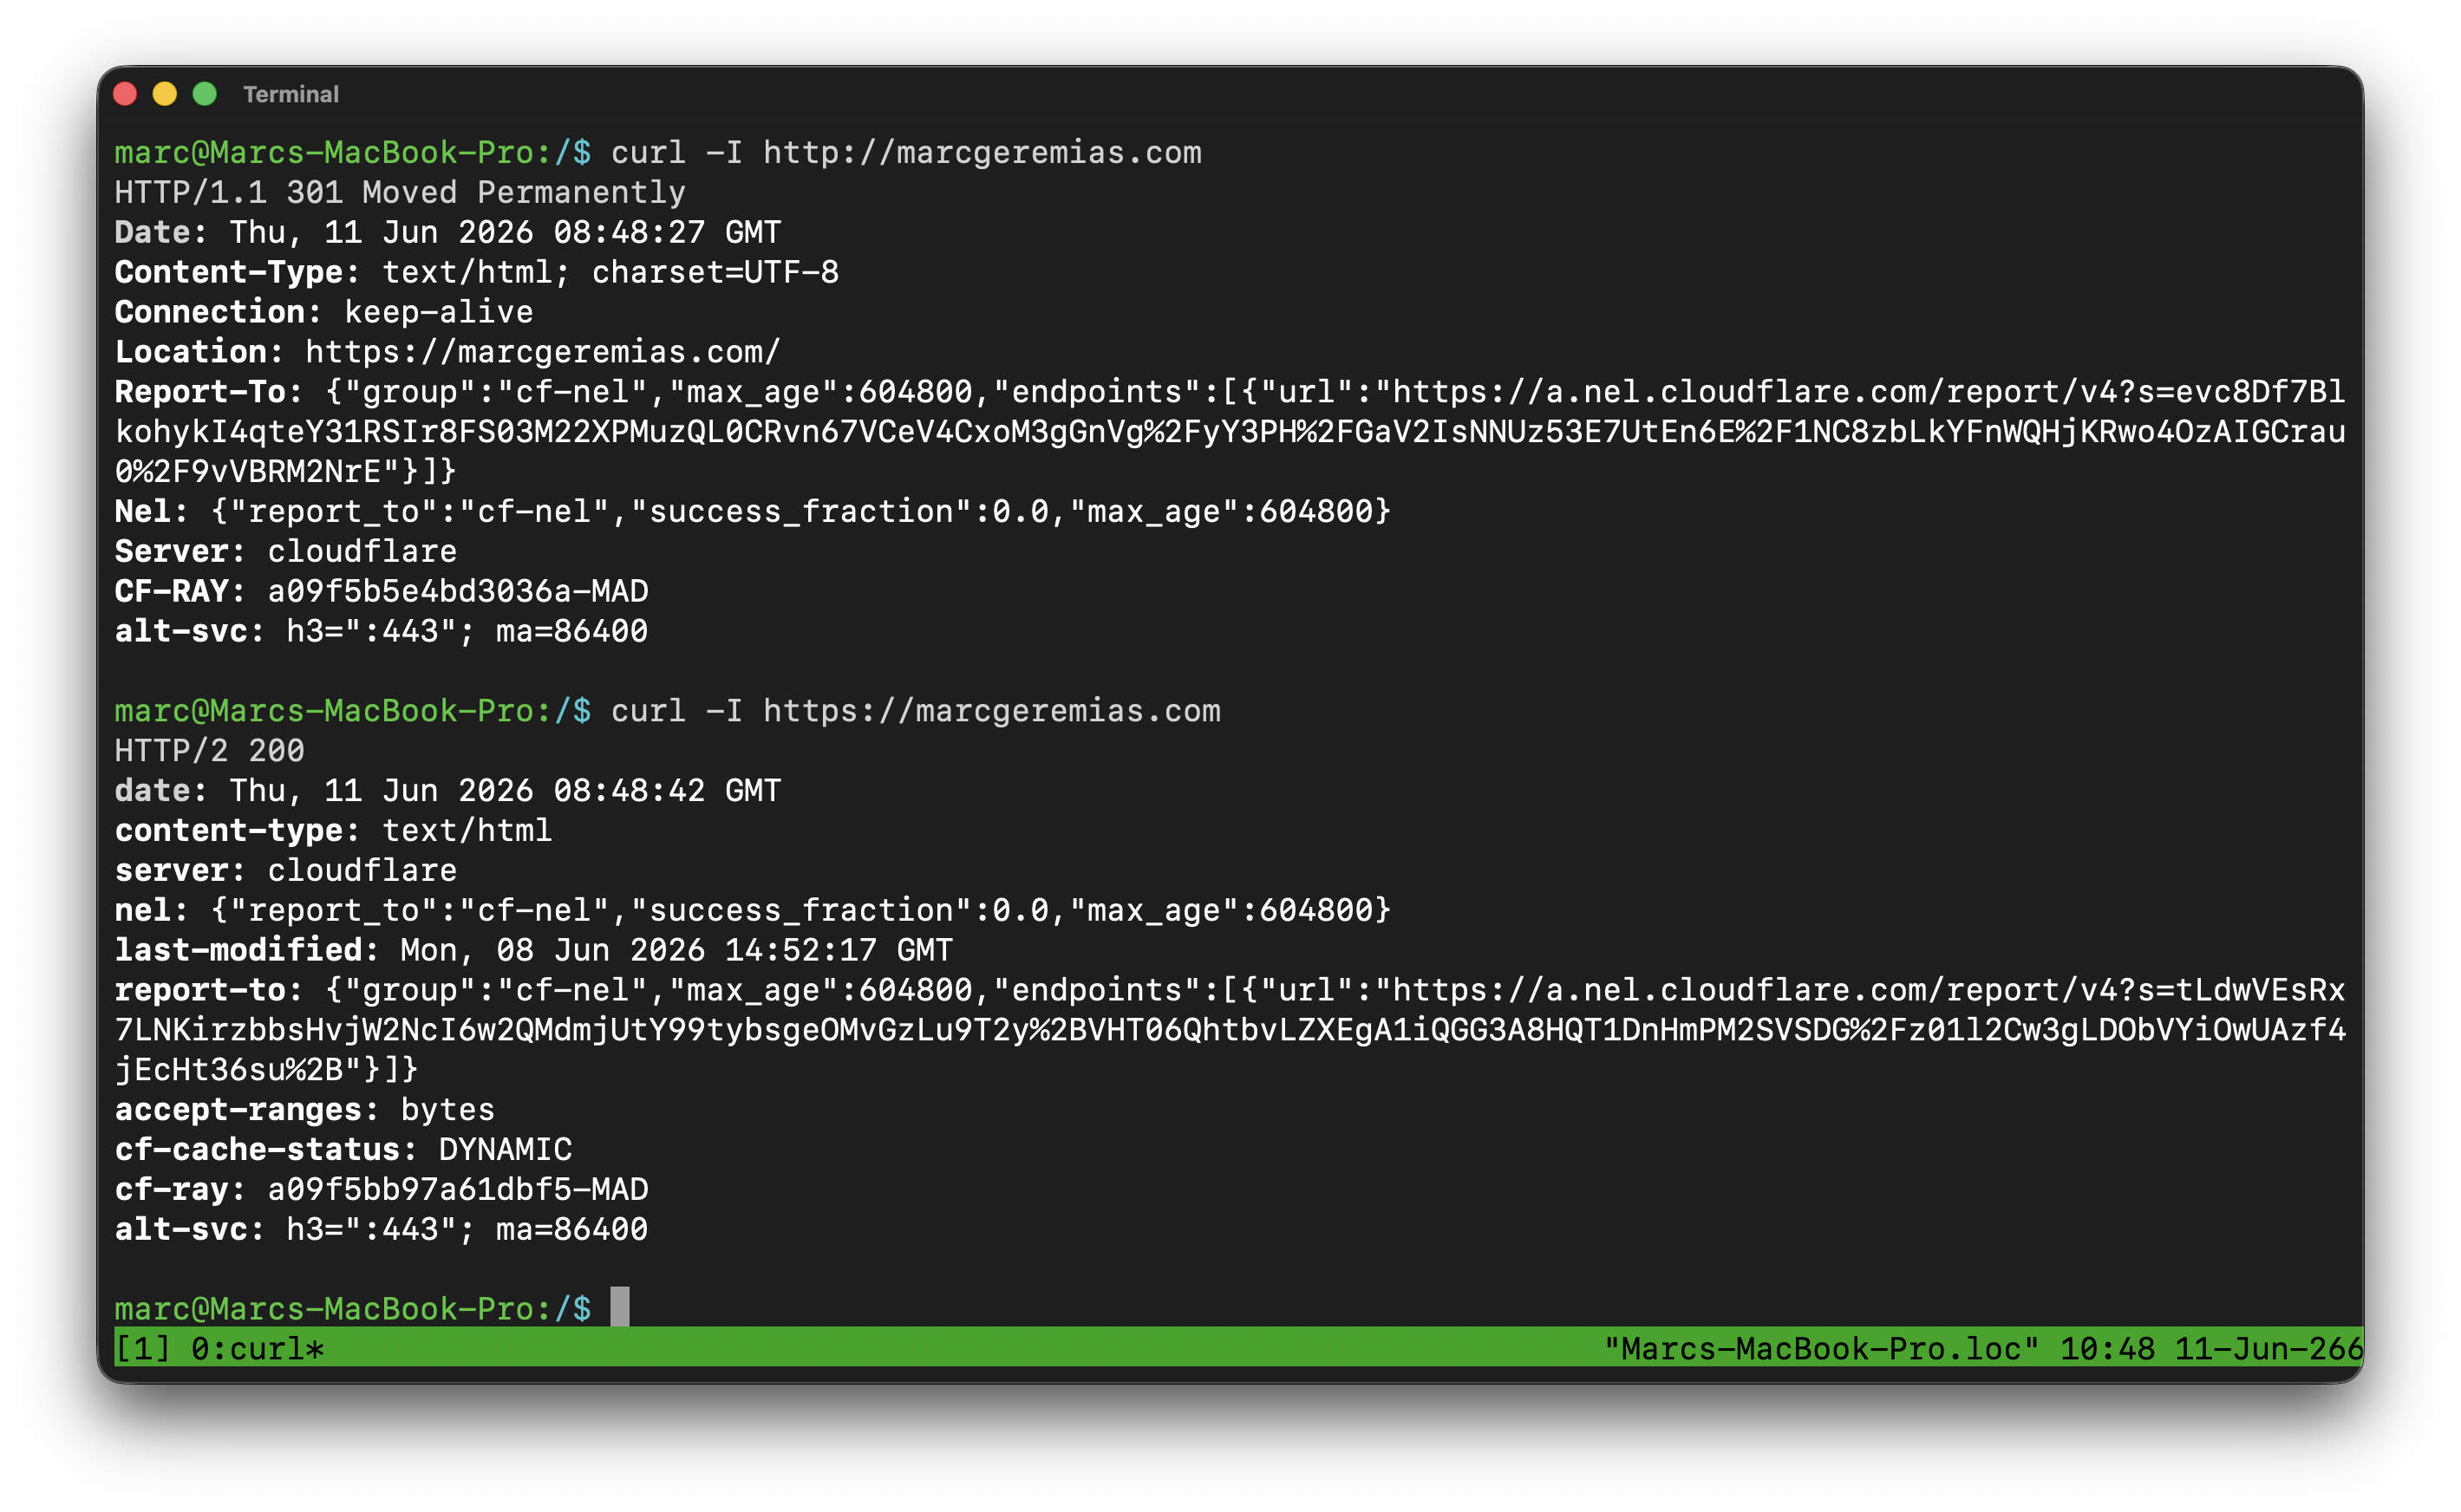
Several Cloudflare-specific headers can now be observed in the response, confirming that requests are being proxied through Cloudflare before reaching the home server.
At this point, an additional configuration was also enabled in Cloudflare: Always Use HTTPS. This automatically redirects all HTTP traffic (port 80) to HTTPS (port 443) at the edge, without requiring any redirection logic on the origin server.
curl -I http://marcgeremias.com
The response shows a permanent redirect:
HTTP/1.1 301 Moved Permanently
Location: https://marcgeremias.com/
This means that any request arriving via HTTP is intercepted by Cloudflare and redirected to HTTPS before it reaches the origin.
As a result:
- Port 80 (HTTP) is only used for redirection at the Cloudflare edge
- Port 443 (HTTPS) is used for the actual encrypted connection to the origin server
Final result
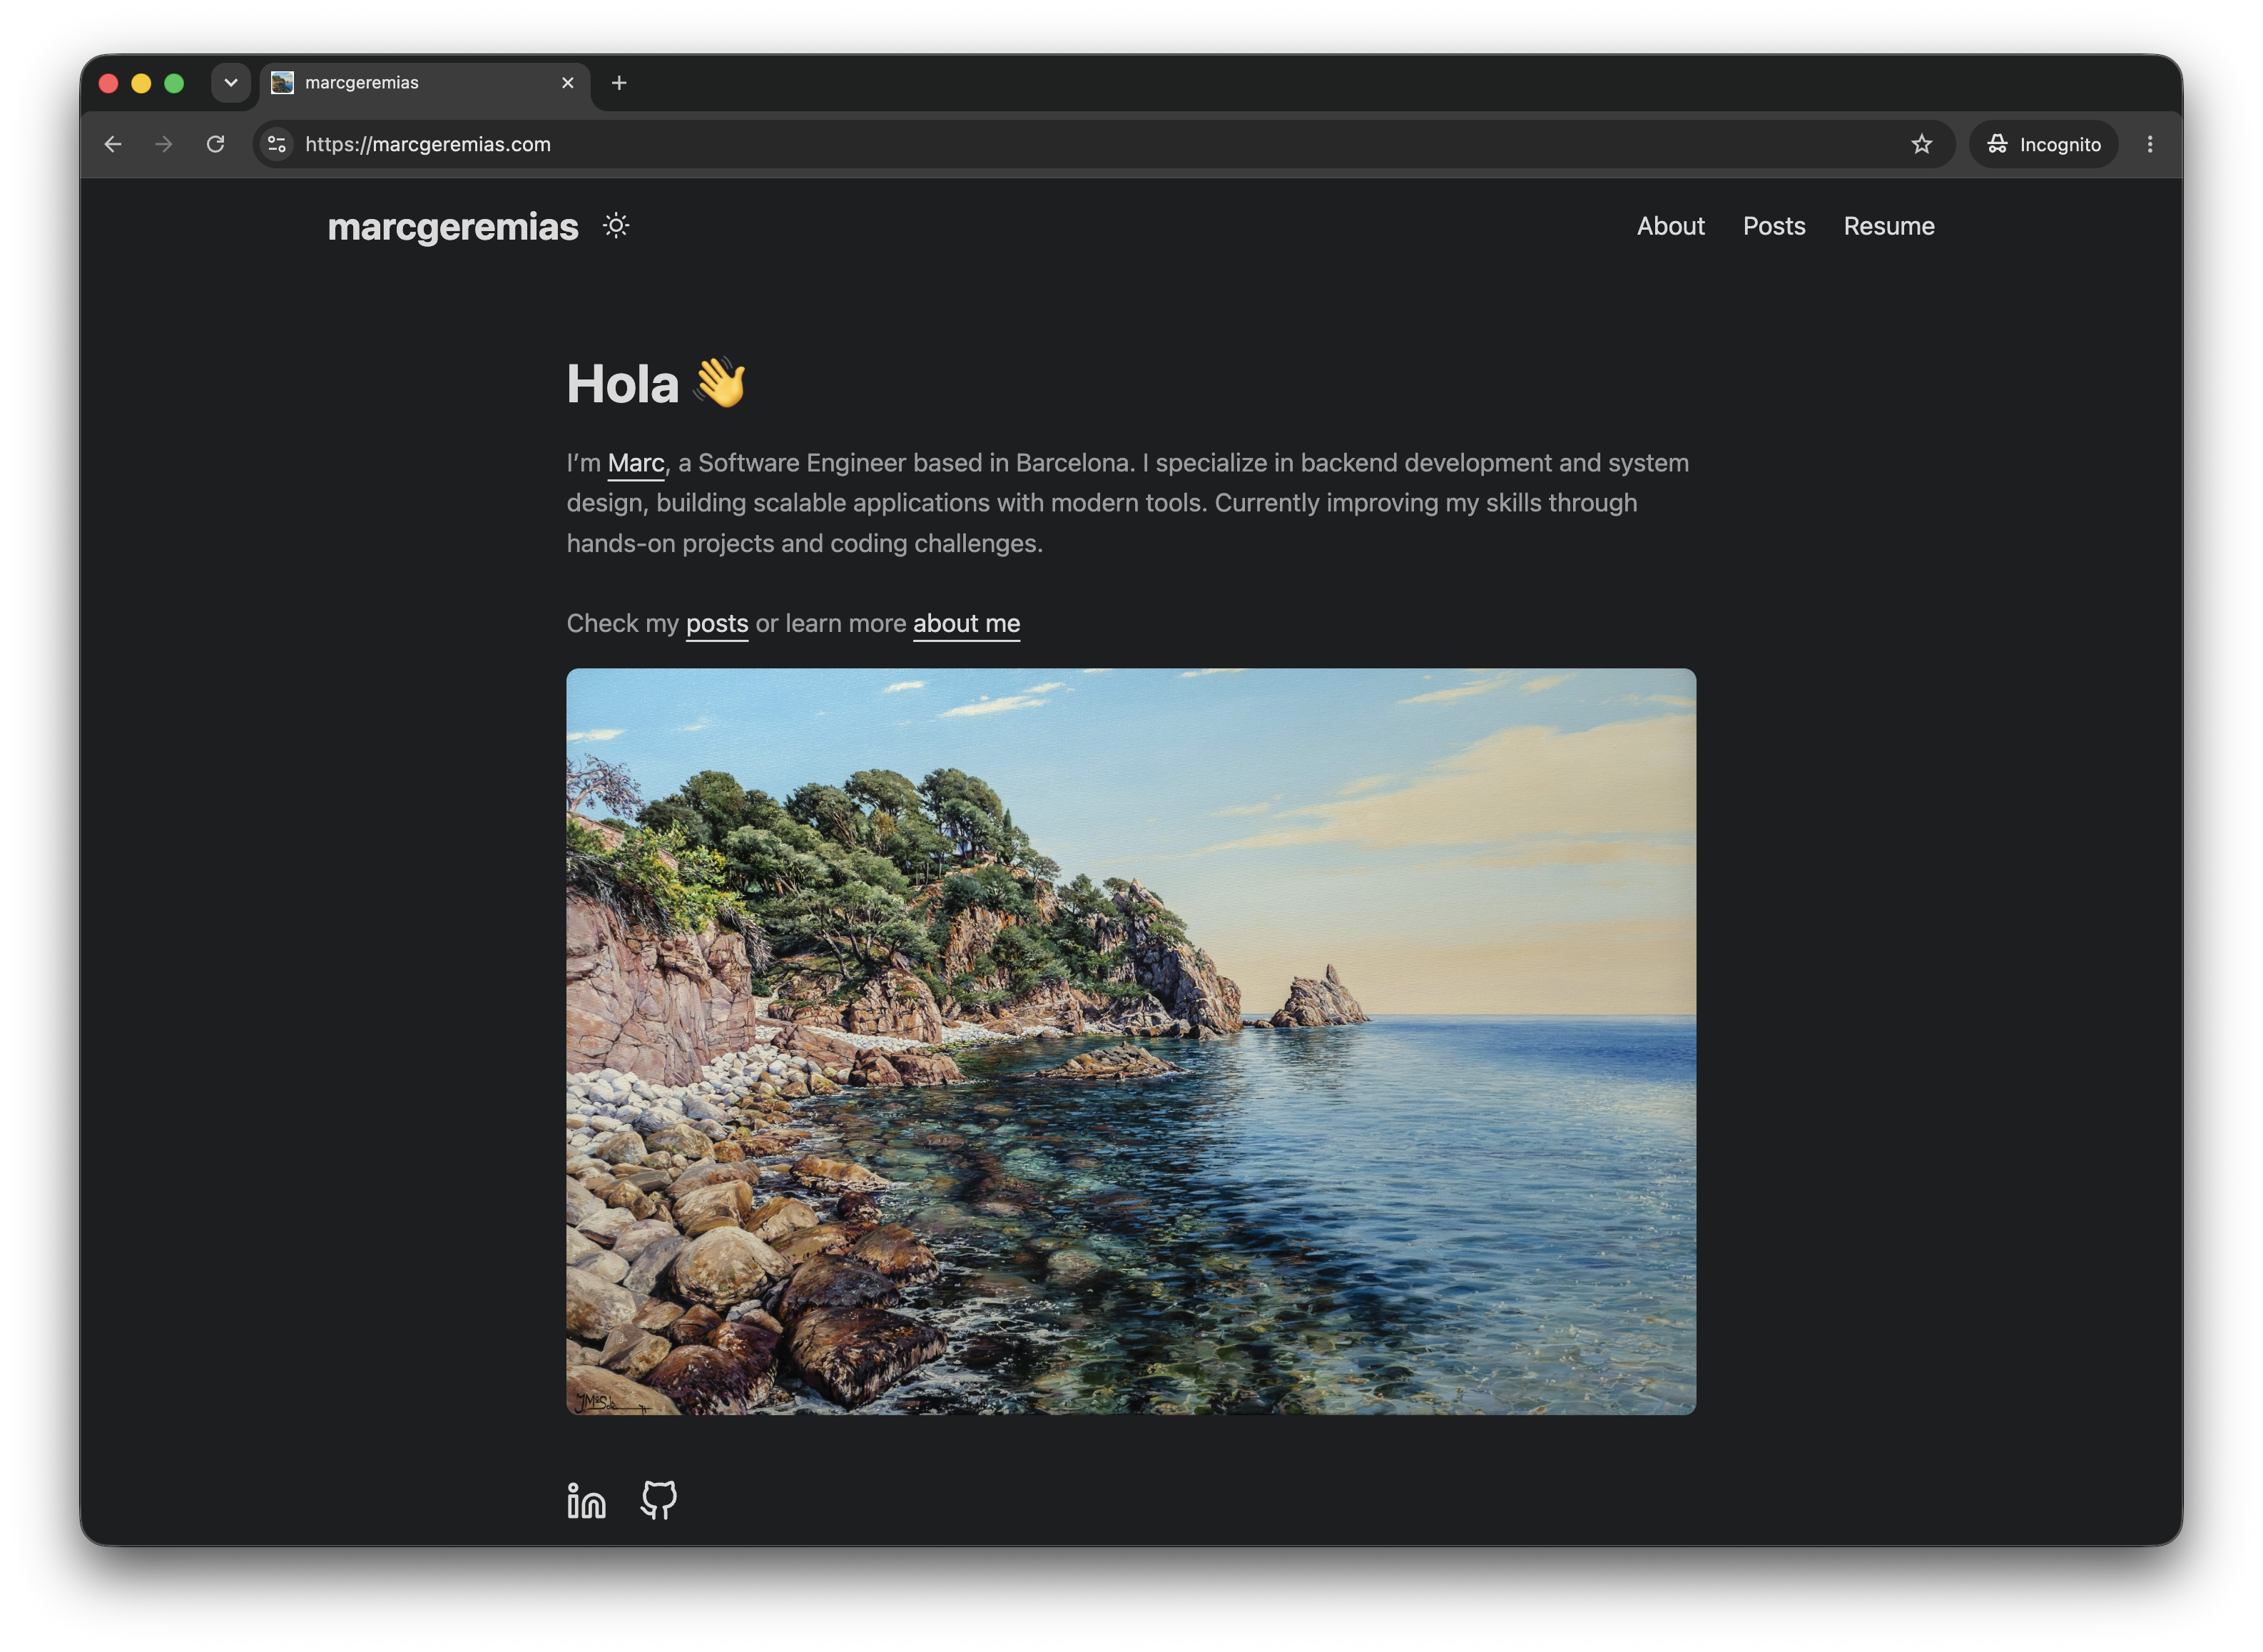
At this point the website is accessible through HTTPS using a valid certificate chain and encrypted end-to-end communication.
Compared to the previous iteration, the architecture now includes Cloudflare as an additional layer between visitors and the home server.
This improves security considerably while still keeping the infrastructure relatively simple.
In future iterations I would like to introduce a proper reverse proxy solution such as Nginx Proxy Manager or Traefik in order to host multiple services behind the same domain and automatically manage certificates and routing.