Introduction
In the previous iteration, the blog was directly exposed to the internet through port 443. This approach works perfectly fine when hosting a single web service, but it quickly becomes a problem as the number of services increases.
The main problem is that a server cannot have multiple services listening on the same port. If I wanted to deploy another web application, for example, I would need to expose it through a different port:
marcgeremias.com → :443  → Blog
marcgeremias.com → :8443 → Another application
This is not ideal from either a usability or scalability perspective. Ideally, I want all my web applications to be accessible through the standard HTTP and HTTPS ports while still being able to route each request to a different container.
This is where a reverse proxy becomes useful. A reverse proxy acts as a single entry point for incoming HTTP/HTTPS traffic. Instead of exposing every individual application directly to the internet, the reverse proxy receives the request and determines where it should be forwarded.
For example:
Browser
   │
   ▼
Internet
   │
   ▼
Cloudflare
   │
   ▼
Reverse Proxy
   │
   ├── marcgeremias.com → marc-blog
   │
   └── hevy2garmin.marcgeremias.com → hevy2garmin
The reverse proxy can inspect information from the HTTP request, such as the Host header, and use it to determine which backend service should handle the request.
This means that multiple applications can share the same ports while still being accessible through different domains or subdomains.
Choosing a reverse proxy
There are many technologies that can be used to implement a reverse proxy. Some of the most popular options are Caddy, Traefik, and Nginx Proxy Manager.
Most of these solutions satisfy my requirements. I don’t need an extremely complex infrastructure, but I do want something that integrates well with Docker and allows me to easily configure multiple services.
For this reason, I decided to use Nginx Proxy Manager (NPM). Nginx Proxy Manager is based on Nginx but provides a simple web-based GUI for managing proxy hosts, SSL certificates, and other common reverse proxy configuration tasks.
This is particularly useful for a home lab because I don’t have to manually maintain large Nginx configuration files for every service.
Docker network
Since the reverse proxy will need to communicate with the other Docker containers, I also want to avoid exposing every application directly on the host. Docker provides a convenient way of solving this problem using Docker networks.
I created a dedicated network called proxy_network:
docker network create proxy_network
The idea is that Nginx Proxy Manager and every web application that needs to be publicly accessible will be connected to this network. The resulting architecture looks like this:
                    Internet
                       │
                       ▼
                   Cloudflare
                       │
                       ▼
              Nginx Proxy Manager
                       │
                 proxy_network
                  ┌────┴────┐
                  │         │
                  ▼         ▼
              marc-blog  hevy2garmin
This means that Nginx Proxy Manager can communicate directly with the containers through Docker’s internal networking.
An important advantage of this approach is that the applications don’t need to be directly exposed to the internet. They only need to be reachable from the reverse proxy through the Docker network.
Dockerizing Nginx Proxy Manager
Instead of installing Nginx directly on the host system, I decided to use the Docker implementation provided by Nginx Proxy Manager. This keeps the reverse proxy isolated from the host operating system and makes the infrastructure easier to reproduce or migrate later.
The Nginx Proxy Manager container is connected to the previously created proxy_network. For example, the relevant part of the Docker Compose configuration looks like:
networks:
  proxy_network:
    external: true
The Nginx Proxy Manager service can then use this network, this is the complete docker-compose.yml file for Nginx Proxy Manager:
services:
  npm:
    image: jc21/nginx-proxy-manager:latest
    container_name: nginx-proxy-manager
    restart: unless-stopped

    ports:
      - "80:80"
      - "81:81"
      - "443:443"

    volumes:
      - ./data:/data
      - ./letsencrypt:/etc/letsencrypt

    networks:
      - proxy_network

networks:
  proxy_network:
    external: true
The important part here is that the network is declared as external. This means that Docker Compose does not create a separate network for the project, but instead connects the container to the already existing proxy_network.
Updating the blog container
The next step was changing the existing marc-blog deployment. Previously, the blog container was directly exposed to the internet:
Internet
   │
   ▼
Host :443
   │
   ▼
marc-blog :443
And the nginx configuration inside the marc-blog container looked like this:
server {
    listen 80;
    return 301 https://$host$request_uri;
}

server {
    listen 443 ssl;

    ssl_certificate     /etc/nginx/certs/cert.pem;
    ssl_certificate_key /etc/nginx/certs/key.pem;

    location / {
        root /usr/share/nginx/html;
        index index.html;
    }
}
This meant that the blog container itself was responsible for serving HTTPS traffic and managing the Cloudflare Origin Certificate. With the reverse proxy architecture, this is no longer necessary.
I stopped the existing container and changed its configuration so that the blog is only available through the Docker network. The container no longer needs to expose port 443 to the host. Nginx Proxy Manager will communicate with it directly through Docker networking.
The architecture is now:
Internet
   │
   ▼
Cloudflare
   │
   ▼
Nginx Proxy Manager
   │
   ▼
proxy_network
   │
   ▼
marc-blog :80
The blog’s internal Nginx configuration can therefore be simplified to HTTP:
server {
    listen 80;

    location / {
        root /usr/share/nginx/html;
        index index.html;
    }
}
The important difference is that HTTPS is no longer handled by the blog container.
SSL/TLS termination
Moving the reverse proxy in front of the applications also changes where SSL/TLS is handled. Previously, the architecture was:
Browser
   │
   ▼
Cloudflare
   │
   ▼
marc-blog
   │
   └── SSL/TLS
Now, Nginx Proxy Manager becomes responsible for handling HTTPS connections from Cloudflare:
Browser
   │
   ▼
Cloudflare
   │
   ▼
Nginx Proxy Manager
   │
   ├── HTTPS
   │
   └── HTTP → application
Since Cloudflare is configured in Full (Strict) mode, the connection between Cloudflare and Nginx Proxy Manager must still use a valid certificate. Instead of configuring an individual certificate inside every application, I configured the Cloudflare Origin Certificate directly in Nginx Proxy Manager.
The certificate can cover the entire domain using a wildcard:
*.marcgeremias.com
This means that the same certificate can be used for different subdomains, for example:
marcgeremias.com
hevy2garmin.marcgeremias.com
This also removes the need to manage SSL certificates independently inside every application.
Configuring the first proxy host
Once Nginx Proxy Manager was connected to proxy_network, I could create a Proxy Host for the blog. The configuration essentially tells Nginx Proxy Manager:
When the Host is:
marcgeremias.com
Forward the request to:
marc-blog:80
Because both containers are connected to the same Docker network, Nginx Proxy Manager can resolve marc-blog using Docker’s internal DNS. There is therefore no need to use the host’s IP address or expose the blog container to the internet.
The request flow is now:
Browser
   │
   ▼
https://marcgeremias.com
   │
   ▼
Cloudflare
   │
   ▼
Nginx Proxy Manager
   │
   │ Host: marcgeremias.com
   ▼
marc-blog:80
This is already a significant improvement over the previous architecture because the blog is no longer directly exposed to the public internet.
Adding a second application
Now that the reverse proxy is working, we can test whether the architecture actually solves the original problem. For this proof of concept, I decided to deploy another application: Hevy2Garmin.
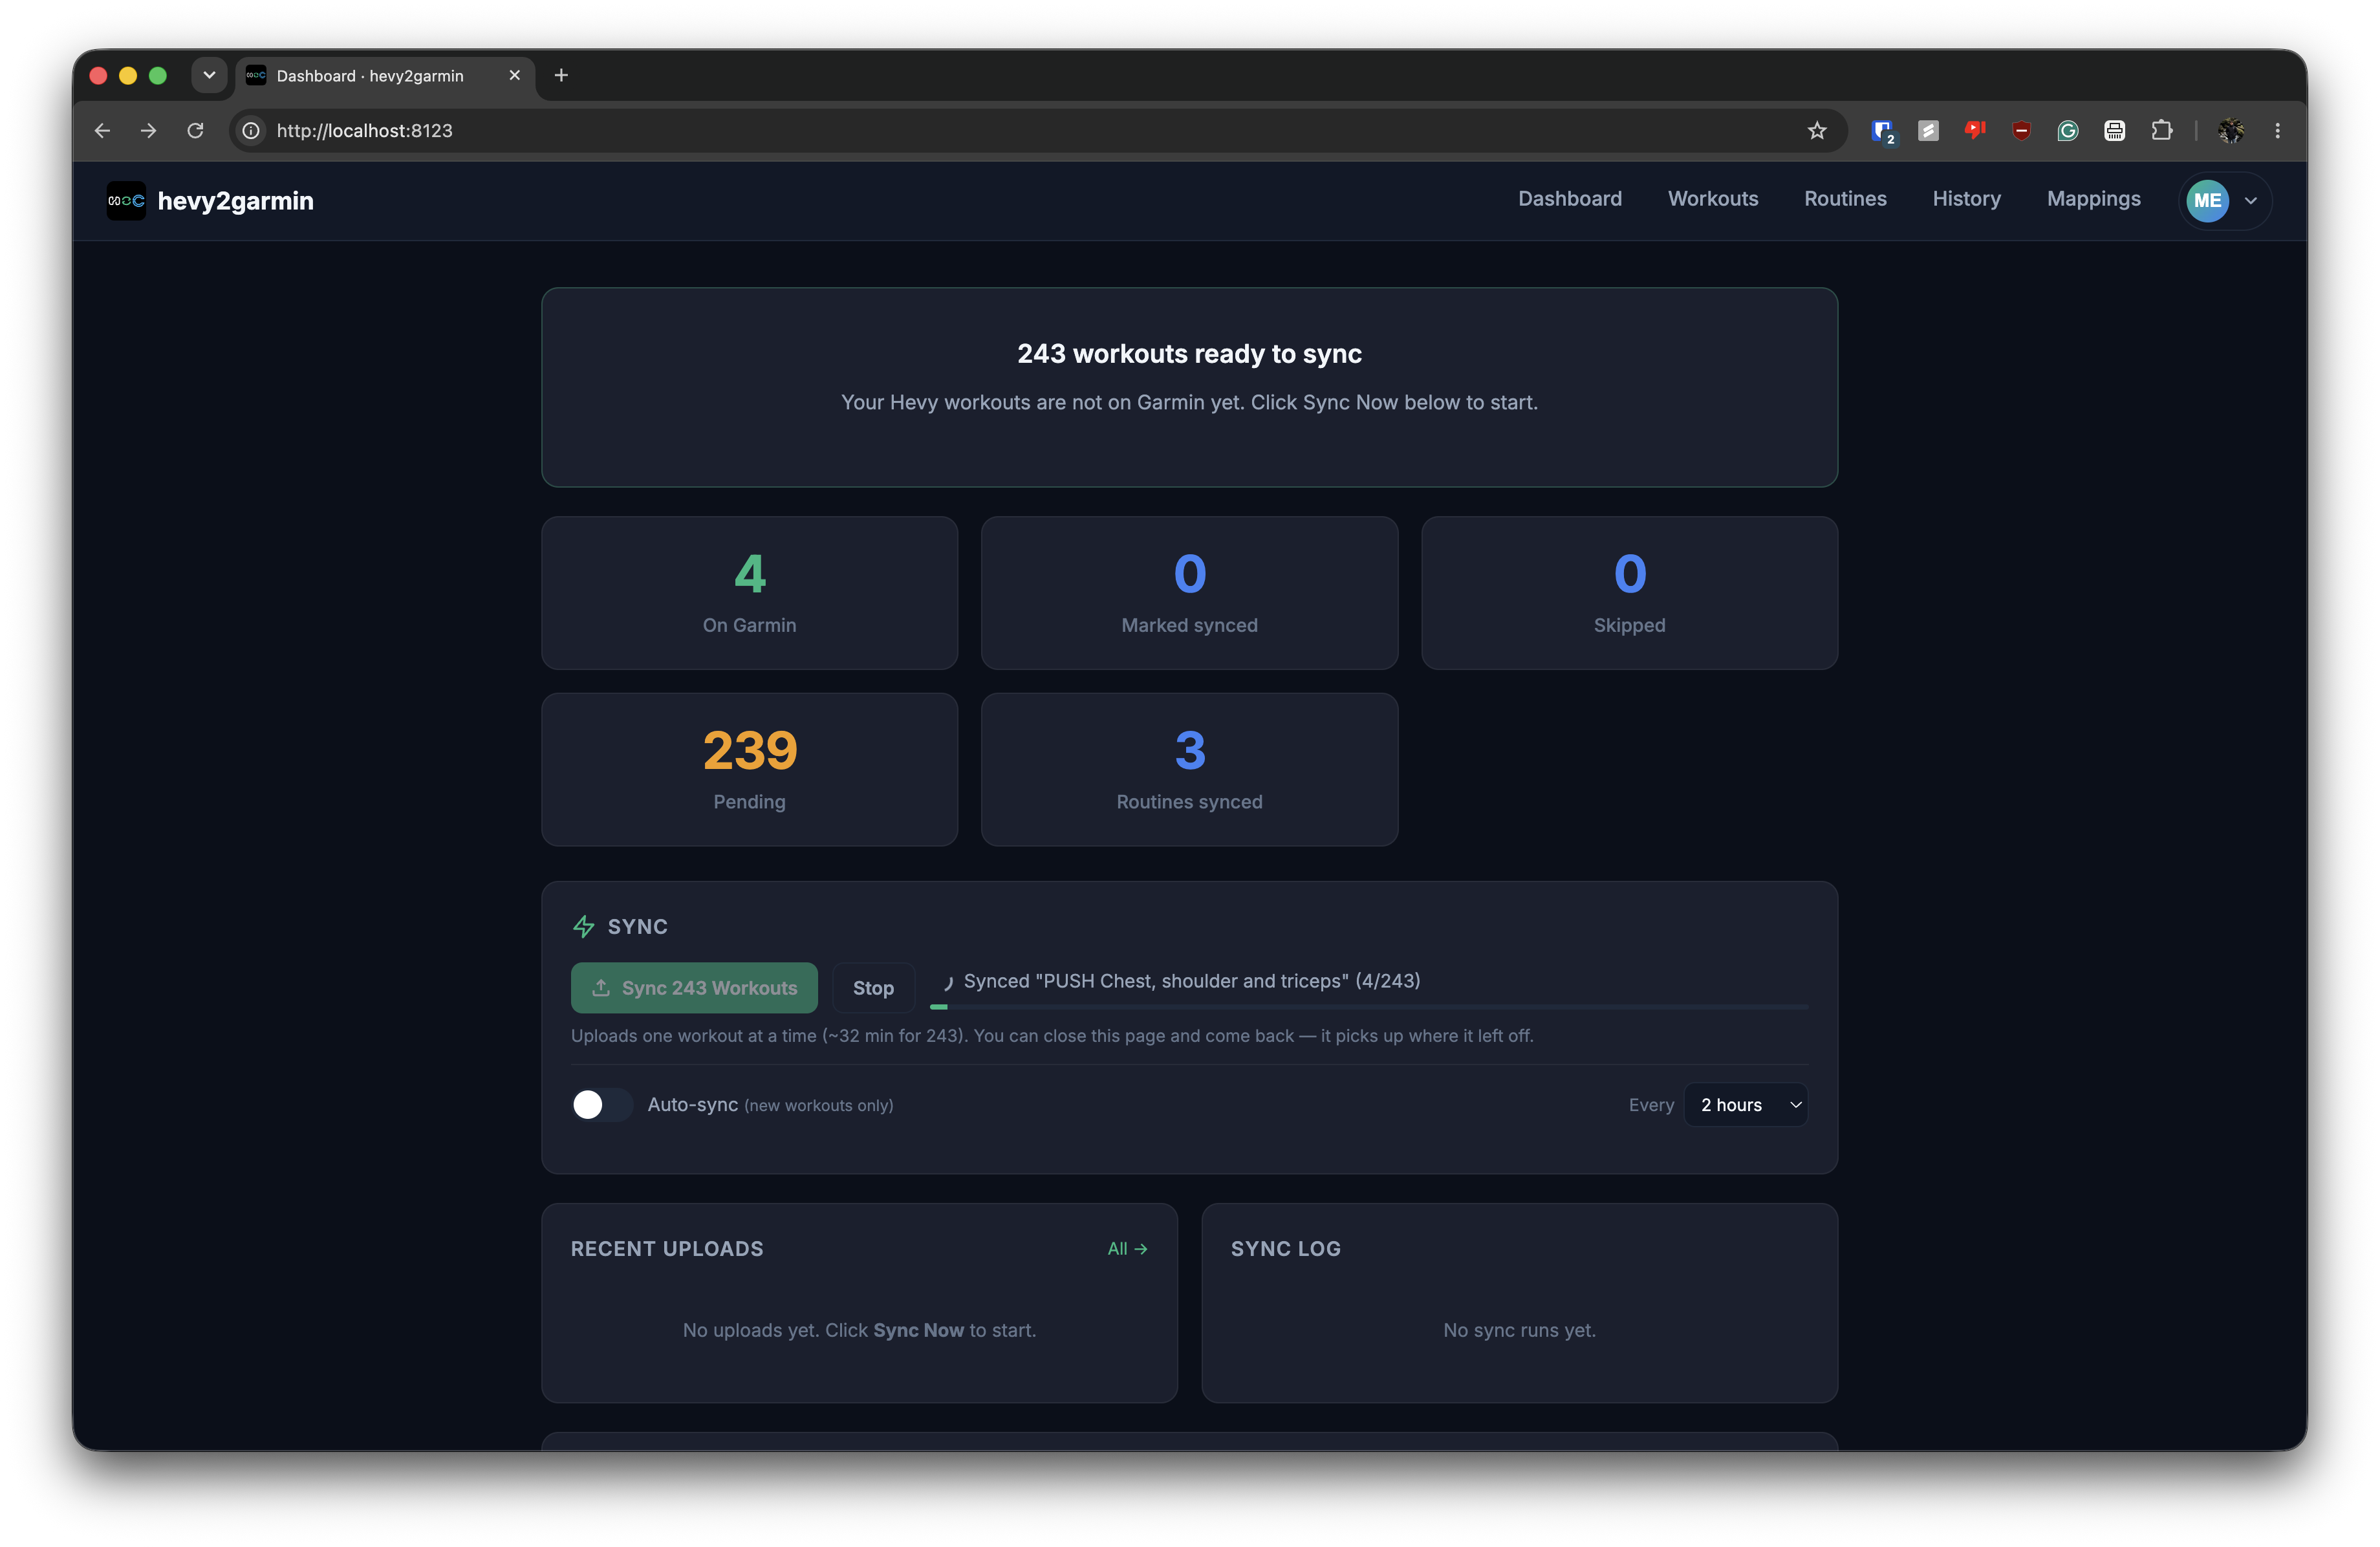
Hevy does not provide the integration with Garmin that I would like, so I decided to run my own small service to synchronize the data. The important part for this experiment is not the application itself, but how it is exposed.
The container only needs to be connected to the same Docker network, so we will modify the docker-compose.yml file for Hevy2Garmin to include the network and avoid recreating the network:
services:
  hevy2garmin:
    build: .
    image: hevy2garmin
    container_name: hevy2garmin
    restart: unless-stopped
    command: serve
    env_file: .env
    ports:
    ......
    networks:
      - proxy_network

volumes:
  hevy2garmin_data:
  garmin_auth:

networks:
  proxy_network:
    external: true
There is no need to expose another port on the host. Instead, Nginx Proxy Manager is configured with another Proxy Host:
hevy2garmin.marcgeremias.com
        │
        ▼
Nginx Proxy Manager
        │
        ▼
hevy2garmin:8123
The application is therefore accessible through its own subdomain while sharing the same public ports as the blog. This is exactly the problem that the reverse proxy was intended to solve.
Instead of:
:443 → Blog
:8443 → Hevy2Garmin
:9443 → Another service
we can now have:
marcgeremias.com              → marc-blog
hevy2garmin.marcgeremias.com  → hevy2garmin
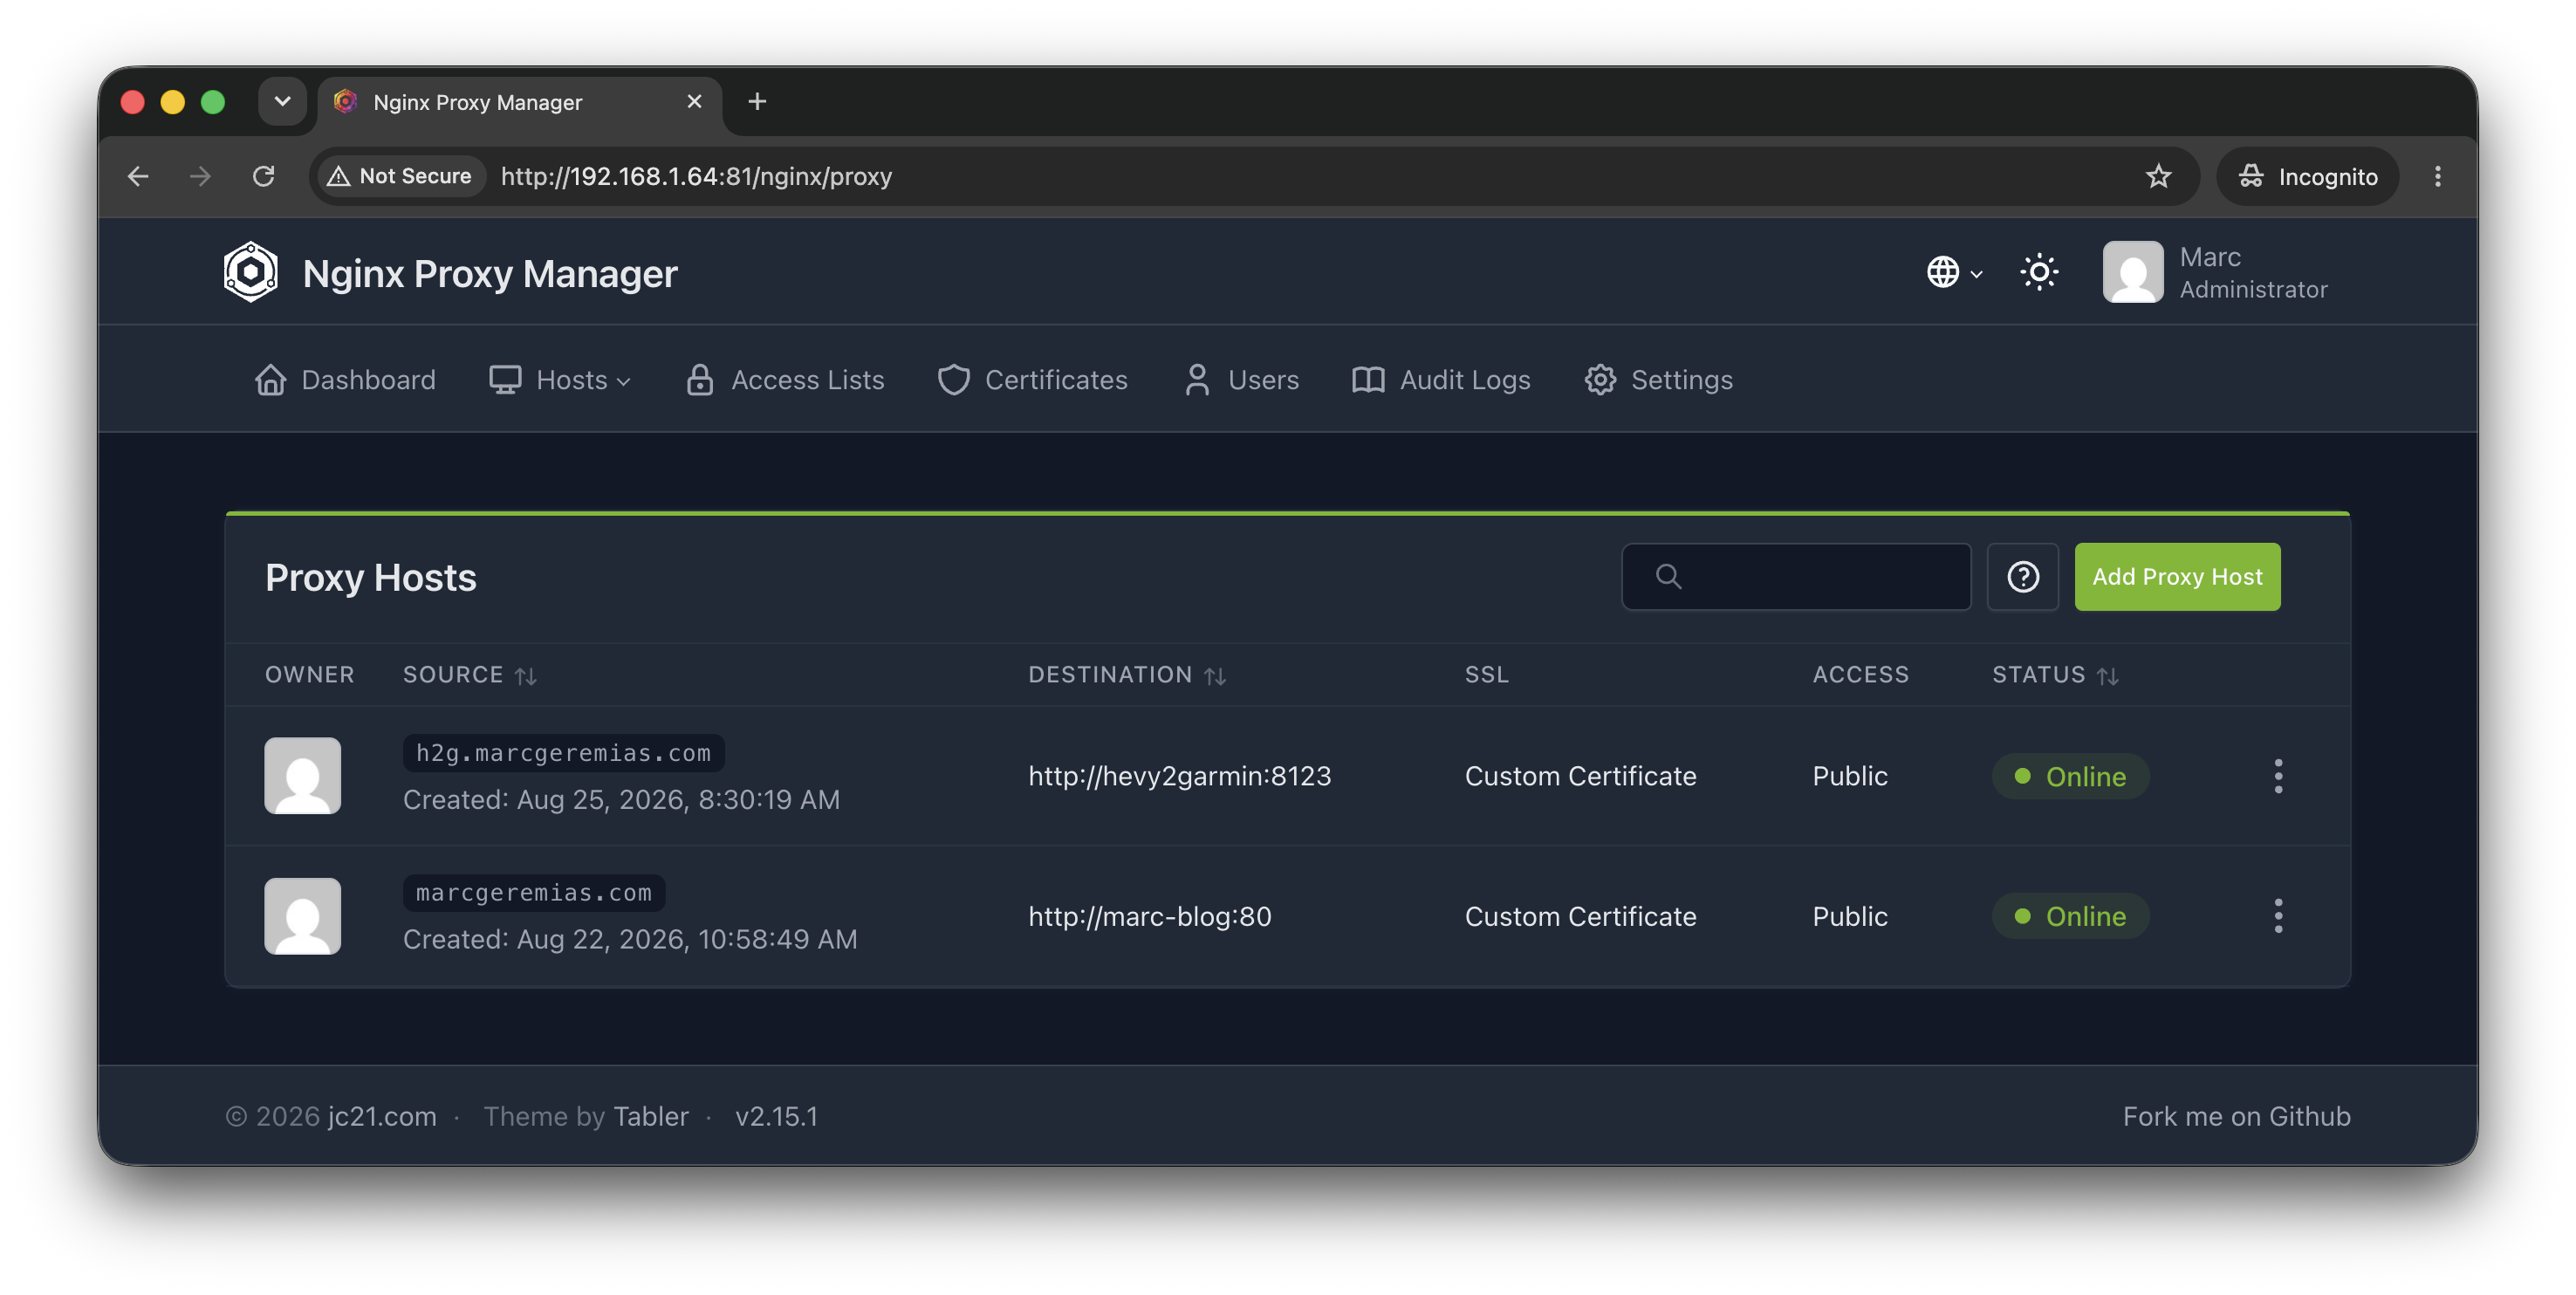
This is the configuration in Nginx Proxy Manager for the current setup. The first Proxy Host is for the blog, and the second one is for Hevy2Garmin. Both are using the same Cloudflare Origin Certificate for SSL/TLS termination.